Kenmore 12 Stitch Sewing Machine Manual: A Comprehensive Guide
This manual offers detailed instructions for Kenmore 12-stitch machines, including models 158.1813 and 158.1212, covering threading, tension, and stitch selection.
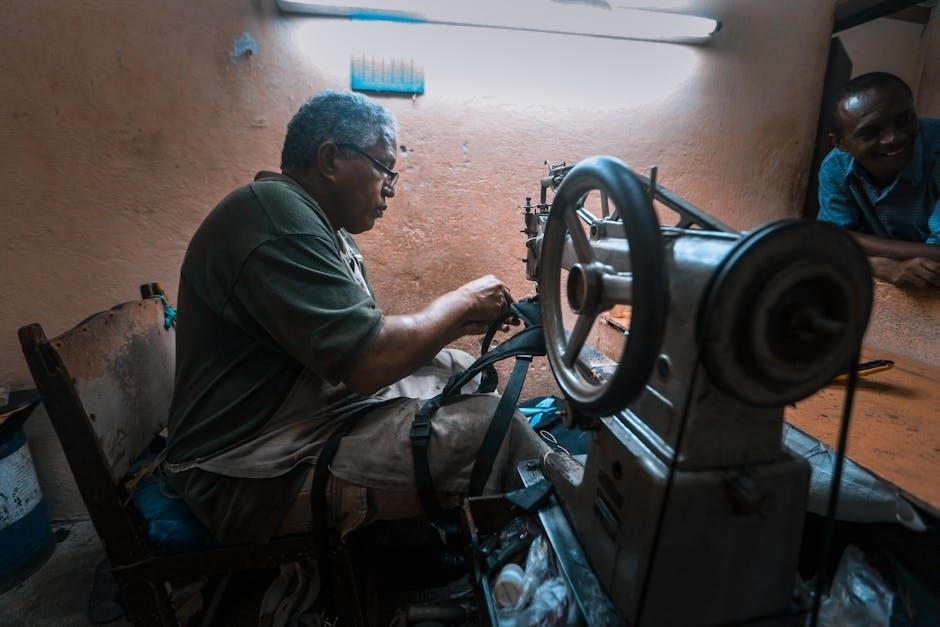
The Kenmore 12-stitch sewing machine, manufactured primarily between 1979 and 1981, represents a reliable and versatile option for both beginner and experienced sewers. These machines, often bearing model numbers like 158.1813, 158.1212, and 158.17851, gained popularity for their durability and range of stitch capabilities. A key aspect of these machines is their connection to Janome, with approximately 385 Kenmore models actually being manufactured by Janome.
This introduction serves as a starting point for understanding the operation and maintenance of your Kenmore 12-stitch machine. Whether you’ve recently acquired a vintage model or are revisiting a familiar machine, this guide aims to provide comprehensive support. Locating the correct manual, often available as a PDF through Sears Parts, is crucial for optimal performance and longevity. Familiarizing yourself with the machine’s components and functions will unlock its full potential.
Historical Context & Model Numbers (1979-1981)
Kenmore 12-stitch sewing machines predominantly originate from the late 1970s and early 1980s, specifically the 1979-1981 timeframe. Identifying the production year can be tricky, but clues lie in the plastic casing color – earlier models were light green, transitioning to branded Kenmore cases in subsequent years. Common model numbers include 158.1813, 158.1212, and 158.17851, with serial numbers offering further dating assistance.
During this period, Kenmore partnered with Janome, resulting in approximately 385 Kenmore machines being Janome-made. This collaboration ensured quality and reliability. Finding documentation from 1981 catalogues, though challenging, can reveal 12-stitch settings. Searching Sears Parts by model number remains the most effective method for locating original PDF manuals, providing valuable insight into the machine’s historical context and specific features.
Identifying Your Specific Kenmore 12 Stitch Model
Accurately identifying your Kenmore 12-stitch machine is crucial for accessing the correct manual and parts. Begin by locating the model number, typically found on a plate affixed to the machine. Common examples include 158.1813, 158.1212, and 158.17851. Note the serial number as well; it can help pinpoint the manufacturing date.
The plastic casing can offer a visual clue – light green casings suggest earlier production (1979), while branded Kenmore cases are from later years. Utilize the Sears Parts website and search using your specific model number to locate downloadable PDF manuals. Remember that many Kenmore machines were manufactured by Janome, so referencing Janome resources might also prove helpful. Careful observation and diligent searching will ensure you find the right information for your machine.
Understanding Model Number Variations (e.g., 158.1813, 158.1212)
Kenmore 12-stitch machine model numbers, like 158.1813 and 158.1212, aren’t simply arbitrary designations. These variations often indicate slight differences in features or manufacturing dates. While fundamentally similar, each number corresponds to a specific configuration. For instance, a model identified as 158.17851, with serial number 0012983, likely dates back to 1979, based on casing color and catalogue descriptions.
Accessing the correct manual is paramount, as instructions can vary subtly between models. Sears Parts provides a searchable database where you can input your exact model number to download the corresponding PDF manual. Understanding these nuances ensures you’re utilizing the proper techniques and troubleshooting steps for your particular Kenmore machine, maximizing its performance and longevity.
Kenmore & Janome: The Manufacturing Connection (385 Machines)
A significant aspect of Kenmore sewing machines, particularly the 385 series, lies in their manufacturing relationship with Janome. Many Kenmore models, including several 12-stitch variants, were actually produced by Janome, a renowned Japanese sewing machine manufacturer. This collaboration allowed Sears (Kenmore’s parent company) to offer reliable machines under their established brand name.
Recognizing this connection is crucial for sourcing parts and finding compatible resources. Janome parts often interchange with Kenmore machines built by Janome. When searching for manuals or troubleshooting assistance, exploring Janome resources alongside Kenmore-specific materials can significantly broaden your options. Essentially, understanding this partnership unlocks a wider network of support and compatibility for your vintage Kenmore sewing machine.
Essential Machine Components
Key parts include the needle system, bobbin winding mechanism, presser foot assembly, and thread tension controls – vital for optimal Kenmore 12-stitch performance.
Parts Identification: A Detailed Overview
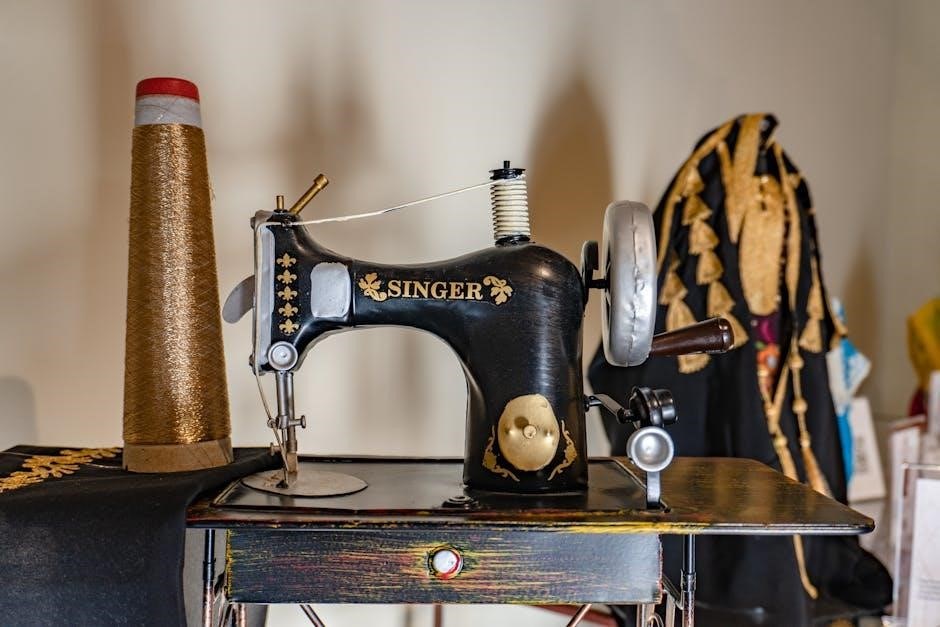
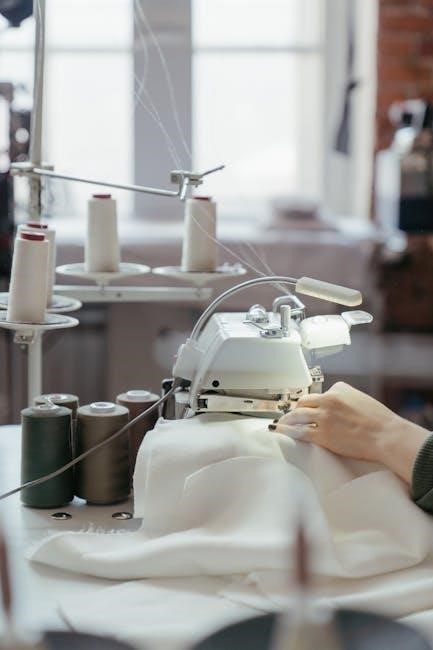
Understanding your Kenmore 12-stitch machine’s components is crucial for maintenance and repair. The machine features a needle, responsible for forming the stitch, and a bobbin, which supplies the lower thread. The bobbin winder prepares the bobbin for use, ensuring consistent thread delivery. The presser foot applies pressure to the fabric during sewing, while the shank connects it to the machine.
Thread tension controls regulate the balance between upper and lower threads, preventing puckering or looping. The stitch dial allows selection from twelve different stitch patterns, offering versatility for various projects. Diagrams within the instruction manual (available on Sears Parts) clearly label each part, aiding in identification. Familiarizing yourself with these elements will empower you to troubleshoot issues and maintain your machine effectively, extending its lifespan and ensuring quality sewing results. Remember that many of these machines were manufactured by Janome (385 machines).
Needle System & Types
The Kenmore 12-stitch machine utilizes a specific needle system – typically a 130/705H, though confirming this in your manual is vital. Selecting the correct needle type is paramount for optimal stitch quality and preventing fabric damage. Universal needles suit most woven fabrics, while ballpoint needles are designed for knits, preventing skipped stitches.
Stretch needles are ideal for spandex and other highly elastic materials. Denim needles, as the name suggests, are robust enough to penetrate heavy-duty fabrics. Needle size corresponds to fabric weight; finer fabrics require smaller needles (e.g., 60/8), while heavier fabrics need larger ones (e.g., 90/14). Regularly replacing the needle, even if not bent, ensures consistent performance. A dull or damaged needle can cause thread breakage and poor stitch formation. Refer to your manual for specific recommendations and replacement guidance.
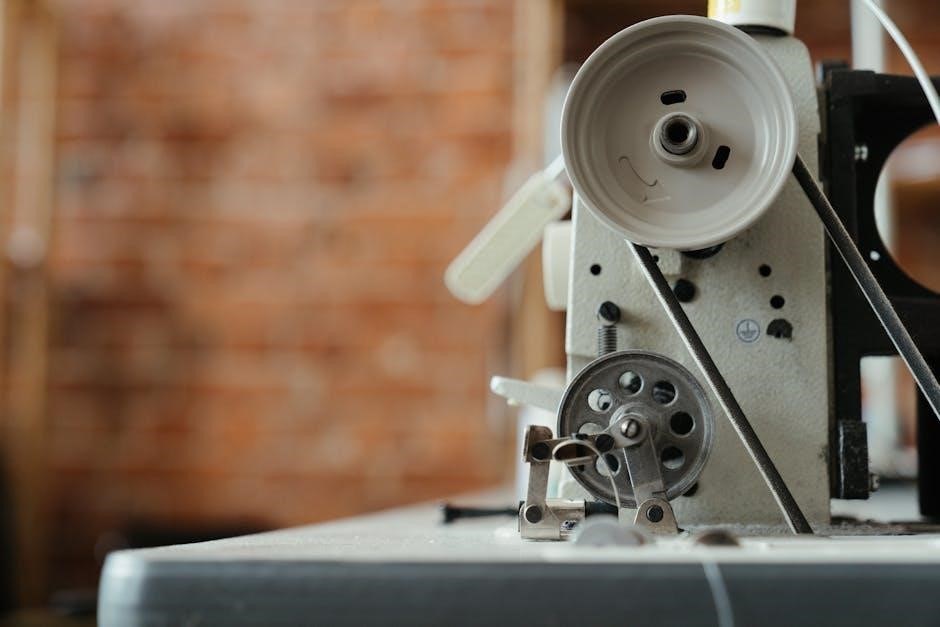
Bobbin Winding Mechanism
The Kenmore 12-stitch machine’s bobbin winding system is crucial for consistent stitching. Begin by placing the thread spool on the spool pin and guiding the thread through the tension disc. Next, thread the end through the bobbin winder post. Secure the bobbin onto the bobbin winder spindle, ensuring it clicks into place.
Engage the bobbin winder by pushing the bobbin winder stem to the right. Press the foot pedal gently to start winding; the machine will automatically stop when the bobbin is full. Disengage the winder by returning the stem to its original position. Proper tension is vital – too loose results in uneven winding, while too tight can strain the motor. Always use quality thread and ensure the bobbin is wound evenly for smooth operation.
Presser Foot & Shank Assembly
The presser foot and shank assembly on your Kenmore 12-stitch machine are vital for fabric feed and stitch formation. The presser foot applies pressure to the fabric, ensuring consistent movement under the needle. To raise or lower the foot, use the presser foot lever located at the back of the machine.
Different presser feet are available for specialized tasks, such as zippers or buttonholes, and attach to the shank. The shank is the metal post that connects the foot to the machine. Ensure the foot is securely fastened before sewing. Proper foot pressure is essential; adjust it based on fabric weight. Light fabrics require less pressure, while heavier fabrics need more. Regularly check for wear and tear on both the foot and shank.
Thread Tension Control
Proper thread tension is crucial for achieving balanced and professional-looking stitches on your Kenmore 12-stitch machine. The tension dial controls the force applied to the upper thread. Incorrect tension leads to looping, puckering, or thread breakage. Begin with the dial set to the default position, typically marked ‘4’ or a similar neutral value.
To adjust tension, observe the stitch formation. If the bobbin thread appears on the top of the fabric, decrease the upper tension (lower the number). Conversely, if the upper thread loops loosely, increase the tension (raise the number). Always test adjustments on scrap fabric matching your project material. Minor adjustments often yield significant improvements. Refer to the manual for specific guidance related to different fabric types and thread weights.
Setting Up Your Machine
Initial setup involves threading the machine correctly, inserting the bobbin, and adjusting thread tension for optimal stitching performance, as detailed in manuals.
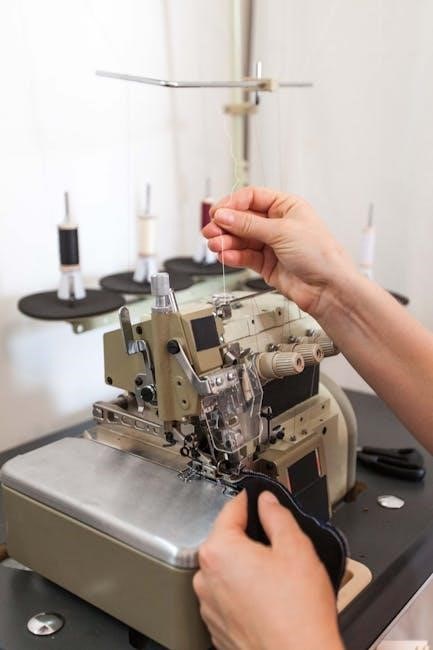
Threading the Machine: Step-by-Step Instructions
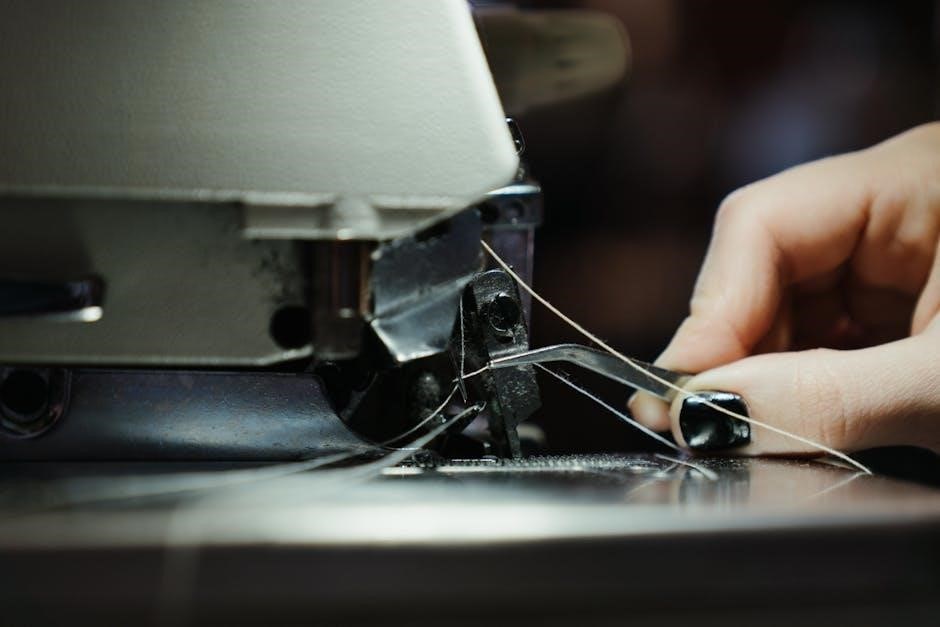
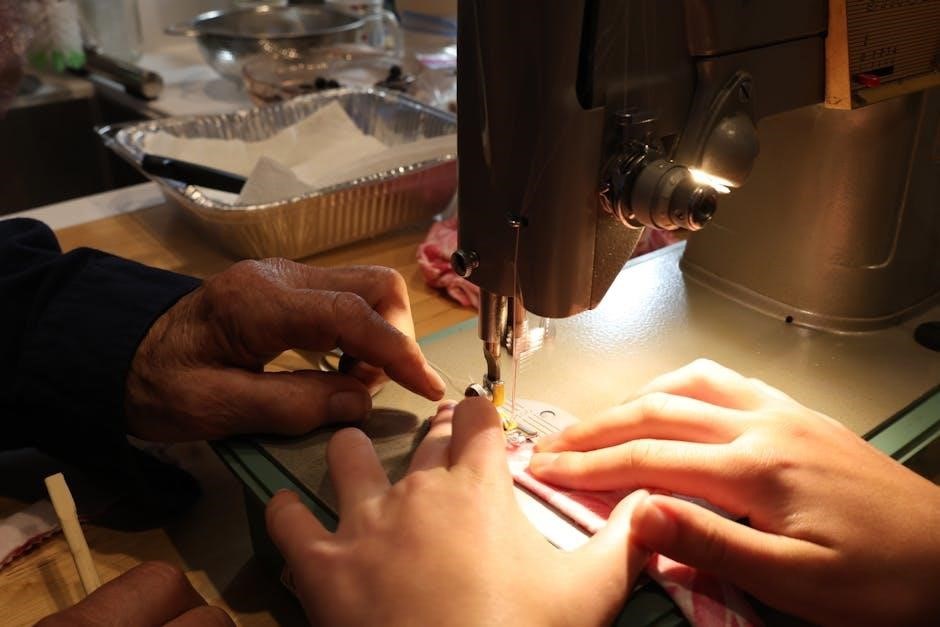
Proper threading is crucial for successful sewing with your Kenmore 12-stitch machine. Begin by raising the presser foot; this releases the tension discs, allowing the thread to seat correctly. Guide the thread from the spool pin, through the first thread guide, and then down to the tension discs – ensure it slips between them.
Next, continue threading through the take-up lever, then down to the needle bar. Finally, thread the needle from front to back. Refer to your specific model’s manual (available on Sears Parts) for diagrams, as slight variations may exist. Incorrect threading leads to skipped stitches or tension problems. Always re-thread if encountering issues, and double-check each step against the illustrated guide. A correctly threaded machine is the foundation for beautiful, consistent stitches.
Bobbin Insertion & Threading
Winding and inserting the bobbin correctly is essential for a balanced stitch. First, place the thread spool on the spool pin and wind the bobbin, following the machine’s winding mechanism instructions. Once full, insert the bobbin into the bobbin case, ensuring it rotates freely and the thread unwinds in the correct direction – typically counter-clockwise.
Guide the thread through the tension spring on the bobbin case, then through the designated slot or guide leading to the needle area. A properly inserted bobbin and correctly threaded upper thread create balanced tension. Consult your Kenmore manual (search by model number on Sears Parts) for specific diagrams. Incorrect bobbin threading causes looping or uneven stitches, so careful attention to detail is vital.
Adjusting Thread Tension for Optimal Stitching
Achieving balanced thread tension is crucial for quality stitches. Begin with the tension dial set to its default position, typically marked ‘4’ or a similar mid-range value. Test stitch on a scrap fabric, observing the stitch formation. If the bobbin thread pulls to the top, loosen the upper thread tension (lower the number). Conversely, if the upper thread pulls to the bottom, tighten the upper thread tension (increase the number).
Small adjustments are key; a slight turn of the dial can make a significant difference. Refer to your Kenmore 12-stitch manual (available on Sears Parts by model number) for specific guidance. Consistent tension ensures even stitches and prevents puckering or looping. Remember to re-test after each adjustment until a balanced stitch is achieved.
Selecting Stitches: The 12 Stitch Dial
The Kenmore 12-stitch machine’s dial offers a variety of stitch options beyond the standard straight and zigzag. Rotate the dial to choose your desired stitch – explore decorative options alongside functional ones. Some stitches are ideal for specific fabric types or applications, like stretch fabrics or creating decorative embellishments. Experiment with different settings to understand each stitch’s unique characteristics.
Refer to your machine’s manual (found via Sears Parts, searching by model number) for a detailed explanation of each stitch’s purpose. Play with the stitch width and length adjustments alongside the dial selection to customize your sewing; Remember to test each stitch on scrap fabric before applying it to your project.

Basic Sewing Operations
Mastering straight and zigzag stitches is fundamental; utilize the 12-stitch dial for diverse applications, adjusting seam allowances and stitch lengths as needed.
Straight Stitching: Techniques & Tips
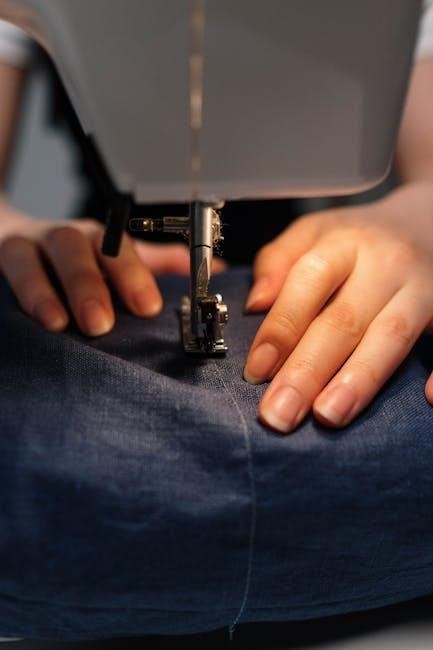
Achieving a perfect straight stitch with your Kenmore 12-stitch machine requires a few key techniques. Begin by ensuring the machine is properly threaded and the bobbin is correctly inserted, as these are foundational for consistent stitching. Select the straight stitch setting on the 12-stitch dial and adjust the stitch length according to your fabric type and project needs – shorter stitches for delicate fabrics, longer for heavier materials.
Maintain a consistent sewing speed and gently guide the fabric, avoiding pulling or pushing. Use the presser foot as a guide, keeping the edge of the fabric aligned with the desired seam allowance. Regularly check the back of your work to ensure the stitches are even and straight. Practice on scrap fabric before starting your project to refine your technique. Remember to raise the presser foot when turning corners to prevent fabric bunching and maintain stitch accuracy. Snip the threads cleanly after completing each seam.
Zigzag Stitching: Applications & Adjustments
The zigzag stitch on your Kenmore 12-stitch machine is incredibly versatile. Beyond basic seam finishing to prevent fabric fraying, it’s ideal for stretch fabrics, appliqué, and decorative embellishments. Select the zigzag stitch on the dial and experiment with the stitch width and length adjustments. A narrower width is suitable for reinforcing edges, while a wider width creates bolder decorative effects.
For stretch fabrics, use a slightly longer stitch length to allow for fabric movement without puckering. When appliquéing, a narrow zigzag stitch securely attaches patches. Adjust the tension as needed to ensure balanced stitches on both sides of the fabric. Practice on scrap fabric to determine the optimal settings for your specific material and desired outcome. Remember to test different widths and lengths to unlock the full creative potential of this stitch!
Decorative Stitching: Exploring Creative Options
Your Kenmore 12-stitch machine offers a range of decorative stitches beyond the standard zigzag. These stitches add unique flair to projects, from simple embellishments to intricate designs. Experiment with the stitch dial to discover patterns suitable for creating monograms, decorative edging, or all-over textured effects. Adjust stitch width and length to modify the appearance of each pattern – wider widths create bolder designs, while shorter lengths offer more detail.
Stabilizers are often recommended when using decorative stitches, especially on lightweight fabrics, to prevent puckering. Practice on scrap fabric to master stitch selection and settings before applying them to your final project. Don’t be afraid to combine different decorative stitches for truly personalized creations! Play with thread colors and fabric choices to further enhance the visual impact.
Seam Allowances & Stitch Length
Consistent seam allowances are crucial for accurate sewing and garment construction. The standard seam allowance is 5/8 inch, but project instructions may specify different widths. Utilize the markings on your machine’s needle plate as a guide to maintain uniformity. Adjusting stitch length impacts both the strength and appearance of your seams;
Shorter stitch lengths (around 2.0-2.5mm) are ideal for delicate fabrics or curves, providing greater control and preventing puckering. Longer stitch lengths (3.0-3.5mm) are suitable for heavier fabrics or straight seams, offering speed and efficiency. Always test stitch length on scrap fabric before sewing your project. Remember that a balanced stitch length contributes to a professional finish and durable seam.
Maintenance & Troubleshooting
Regular oiling and cleaning are essential for optimal performance; address thread issues, needle replacements, and common stitching problems promptly for longevity.
Oiling & Cleaning Your Kenmore Machine
Maintaining your Kenmore 12-stitch machine through regular oiling and cleaning is crucial for smooth operation and extending its lifespan. Before oiling, always disconnect the machine from the power source. Use a sewing machine oil specifically designed for this purpose; avoid using general-purpose oils, as they can gum up the mechanism.
Focus oiling on moving parts – refer to your manual for specific points, but generally include the bobbin area, the needle bar, and any gears or linkages. Apply oil sparingly; a drop or two is usually sufficient. After oiling, run the machine briefly to distribute the oil evenly.
Cleaning involves removing lint and dust from the bobbin area, feed dogs, and other accessible parts. A small brush or compressed air can be helpful. Regularly clean around the needle plate to prevent buildup. Consistent maintenance prevents issues and ensures reliable performance.
Troubleshooting Common Stitching Problems
Encountering stitching issues with your Kenmore 12-stitch machine is common, but often easily resolved. If threads break frequently, re-thread both the upper and lower threads, ensuring proper tension. Uneven stitches often indicate incorrect tension – adjust the tension dial incrementally until the stitches are balanced.
Skipped stitches can be caused by a bent or dull needle; replace it with a new one of the correct type. Fabric bunching may signal incorrect presser foot pressure or improper threading. Ensure the presser foot is firmly down and the fabric is feeding smoothly.
If the machine jams, stop immediately, raise the presser foot, and carefully remove the fabric and tangled threads. Regular cleaning and oiling, as detailed elsewhere, can prevent many of these problems.
Replacing the Needle
A dull or bent needle significantly impacts stitch quality, necessitating replacement. Always power off and unplug your Kenmore 12-stitch machine before changing the needle. Loosen the needle clamp screw using the appropriate screwdriver – do not remove it completely. Gently pull the old needle upwards and discard it safely.
Insert a new needle, ensuring the flat side faces the back of the machine. Push it up firmly into the needle clamp, and then tighten the screw securely. Verify the needle is correctly seated before resuming sewing.
Using the correct needle type for your fabric is crucial; consult your manual for recommendations. Regularly inspect your needle for damage and replace it proactively to maintain optimal performance.
Addressing Thread Breakage Issues
Frequent thread breakage can stem from several causes. First, re-thread the machine completely, ensuring the thread is properly seated in all guides and the tension discs. Incorrect threading is a common culprit. Next, verify you’re using the correct thread type and weight for your fabric; a mismatch can cause strain.
Check the needle – a bent or dull needle significantly increases breakage. Adjust the thread tension; too tight or too loose tension can lead to snapping. Ensure the bobbin is wound evenly and correctly inserted.
Finally, slow down your sewing speed, especially with delicate fabrics. Consistent issues may indicate a need for machine cleaning and oiling.
Finding Replacement Parts & Manuals (Sears Parts)
Locating replacement parts and manuals for your Kenmore 12-stitch machine often leads to the Sears Parts website. Searching by your specific model number (e.g., 158.1813, 158.1212) is crucial for accurate results. The site offers a vast inventory of parts, including needles, bobbins, presser feet, and belts.
Many original instruction manuals are available as downloadable PDFs on Sears Parts, though some digging may be required. Be prepared to navigate the site and potentially try variations of your model number.
Remember that Kenmore machines were often manufactured by Janome, so Janome parts may sometimes be compatible. Explore online forums for user experiences and part cross-references.
Advanced Techniques & Resources
Explore online manuals, support forums, and resources for sewing different fabrics, including guides for formal trouser construction, enhancing your skills.
Sewing Different Fabric Types
Successfully utilizing your Kenmore 12-stitch machine requires adapting techniques to various fabrics. Lightweight materials like chiffon demand finer needles and reduced thread tension to prevent puckering. Conversely, heavier fabrics such as denim necessitate robust needles, increased tension, and potentially a longer stitch length for optimal results.
Experimentation is key; always test stitch settings on fabric scraps before commencing your project. Utilize a universal needle for woven fabrics, a ballpoint needle for knits to avoid runs, and a denim needle for, predictably, denim. Adjusting the presser foot pressure can also aid in even feeding, particularly with slippery or stretchy materials. Remember to consult online resources and forums for specific fabric recommendations and troubleshooting tips related to your Kenmore model.
Decorative stitches can beautifully embellish various fabrics, but consider the weight and weave when selecting a design. Heavier fabrics can handle more intricate patterns, while lighter fabrics benefit from simpler, less dense stitches.
Formal Trouser Sewing Guide (Referencing Available Resources)
Constructing formal trousers demands precision, and your Kenmore 12-stitch machine is capable with careful technique. Begin by accurately cutting pattern pieces, interfacing key areas like the waistband for structure. Utilize a straight stitch for primary seams, reinforcing stress points with a zigzag stitch for durability. Precise pressing is crucial at each stage – seams open, then closed, shaping the trousers’ form.
Resources detailing formal trouser construction are readily available online. Search for guides covering techniques like welt pockets, fly fronts, and proper hem finishing. These resources often provide detailed diagrams and step-by-step instructions. Your machine’s zigzag stitch is invaluable for neatening raw edges and creating decorative details. Remember to adjust stitch length and tension based on your chosen fabric weight.
Referencing these external guides alongside your Kenmore manual will ensure a professional finish.
Accessing Online Manuals & Support Forums
Locating your Kenmore 12-stitch sewing machine manual online is often achievable through Sears Parts Direct. Searching by your specific model number (e.g., 158.1813, 158.1212) is key to finding the correct PDF document. Several websites archive vintage manuals, offering a valuable resource if the Sears site proves unhelpful. Be patient; locating older manuals can require diligent searching.
Beyond manuals, numerous online sewing forums and communities cater to vintage machine enthusiasts. These forums provide a platform to ask questions, share troubleshooting tips, and connect with experienced users. Many members possess extensive knowledge of Kenmore and Janome machines (given the manufacturing connection).
These online resources offer invaluable support, supplementing the information within your physical manual.
Safety Precautions & Best Practices
Always prioritize safety when operating your Kenmore 12-stitch machine. Keep fingers clear of the needle during operation to prevent accidental punctures. Raise the presser foot before sliding fabric in or out, and always snip threads after completing a seam. Disconnect the machine from the power source before performing any maintenance, such as oiling or changing the needle.
Regular cleaning and oiling are crucial for maintaining optimal performance and preventing malfunctions. Avoid forcing the fabric or needle, as this can cause damage. Familiarize yourself with the machine’s components and their functions before attempting advanced techniques.
Remember to use the correct needle type for the fabric you are sewing, and always follow the manufacturer’s recommendations.